Instagram

Wednesday 26 October 2016

How to fix Art of War Studios tokens


So you may or may not have ordered product from Art of War Studios, a UK-based store that makes and sells gaming aids, like token's and measuring sticks.

Before I ordered anything from them, I've seen lots of complaints about the quality of the products they received from this company. People who are happy with the quality insisted that the customer service at this place was great, and the company could be contacted, to receive better crafted product.

The main complaint I've consistently read about was that the words were un-readable, and it's not what people were expecting compared to the sample pictures on their website. I decided to order some myself, and even if it was a bad batch, I knew I could probably salvage it. Besides, the company has very cheap products compared to the competition on the market.

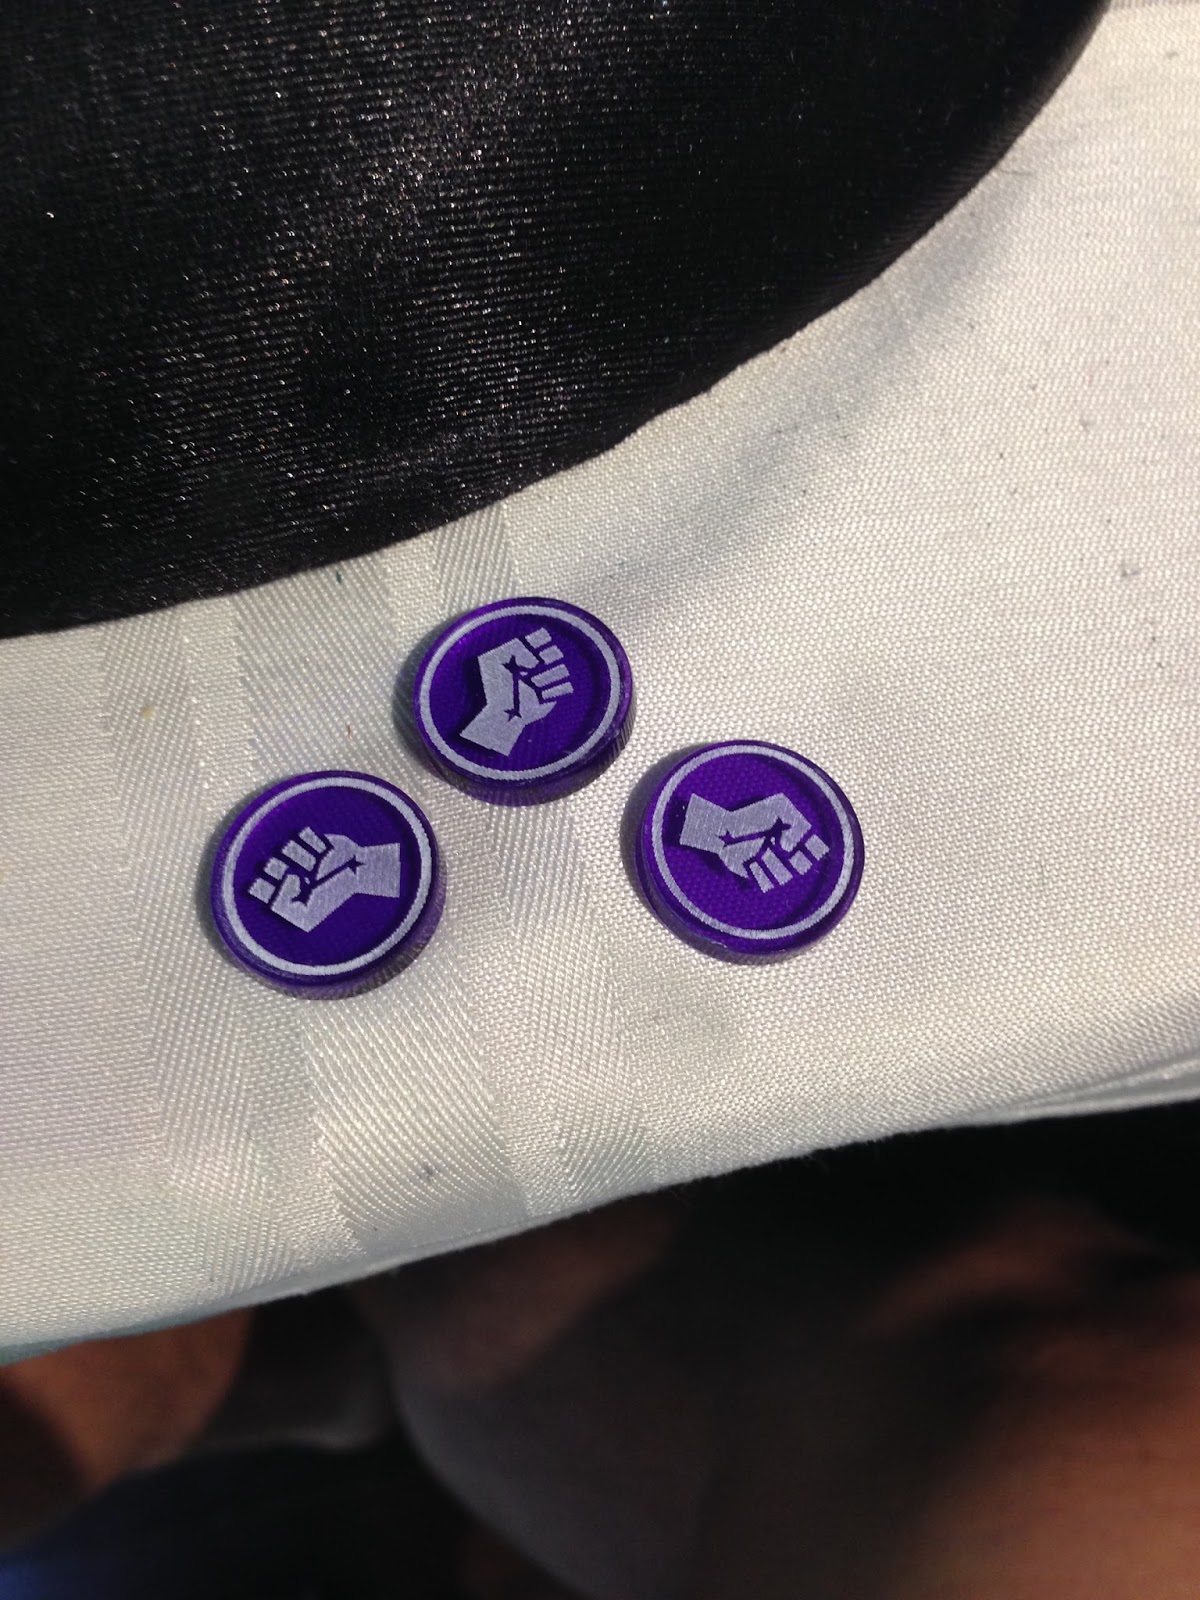
We ordered a few products: Union Influence tokens, Alchemist tokens, Mortician's tokens, and measuring stick sets for a variety of factions. We received the product, and we definitely had product that was not as good-looking as those pictured on the website (See first picture). Not only were the token's symbol's really dull, but more than half the tokens looked like they were scuffed. However, I will show you how to easily fix these tokens.

Now, before you ask me, "why don't you contact Art of War? Their customer service is really good, and they'll send you a new batch!" like I suggested before... it seems that they have given up on making and sending out clear, legible tokens, as our order came with a slip of paper that basically said "here are a few ways you can bring out the detail in your tokens."

Well, here's a simple guide on what to do to make your tokens look sweet and vibrant!

1- Paint the surface with paint. I chose white because I think it 'pops' the best.

2- Use your thumb to wipe the paint off the surface of the token. The idea here is, your thumb will easily remove the paint from the smooth surface, but leave the paint in the recesses of the token.

3- Use your fingernail to scrap off the scrapes from the token. They aren't really scrapes. It's just excess material that hardened on the token when the company was trying to color the detail on their tokens. Your finger nails are tough enough to remove this material, but soft enough that they wont scratch your tokens.


As you can see from the photo, here are the before and after tokens, side-by-side.

This whole process takes very little time, and as a miniature gamer, you probably already have paint lying around at home.

You don't even have to use your good paint. I just used dollar store paint.

Hope this guide helps!

-the aY

Thursday 13 October 2016

Guild Ball Primer: Morticians

Hello again, all!

It's time for a beginner guide on a faction, and just highlighting some basic's that are useful for newer players to know.

This entry is about giving you a basic overview of the Nightmare-Undead-Dark-Faction equivalent in Guild Ball... the Morticians!

The play style you can expect: debuffs, control, and overall just messing with your opponents. If you are the type of player who likes to actively screw up the way your opponent wants to play, Morticians are the faction for you!

The first point to discuss: The captain from the starter box, Obulus. He is practically the definition of being annoying and controlling how your opponent plays. Main things to think about:
-Obulus is hard to pin down with a combination of Unpredictable Movement, and a Momentous Dodge on his first column on his playbook, and a Double Dodge on 2. So, if your Obulus is being attacked somehow, just remember: counter-attack to escape!
-Puppet Master! This ability is so good, it's almost never a mistake to use it. Take advantage of it, to really control your opponent. Whether it's forcing your opponent to pass you the ball, or artificially extending the threat range of your other models... This character play alone is what makes Obulus special.
-Good use of Rigor Mortis (or not using it!). This ability controls the whole pace of the game. As long as you have it available for use, your opponent has to be very mindful of how much Momentum they hold. No opponent will likely let you steal a stack of 10 momentum. But if your opponent thinks you have a chance of using this ability on any given turn, they will spend any momentum they gain, just to deny you from having it. This is not a bad thing. This means you are controlling how they want to play! For a more detailed explanation on more advanced concepts, look at Slothrop's articles, "A Gravedigger's Handbook."

The next model, I feel is pretty much an auto-include in any Mortician's list. Ghast. He is arguably the best defensive model and tank in the game, and he does this through a combination of control and brute force.

He has a few abilities that are just so good together, that some players may not be able escape his grasp. A combination of being a medium base and having a 2" melee range gives him a big area he can threaten. The momentous KD on his second column, combined with a TAC of 6 means two things: One, you can generate a lot of momentum and Knock down a lot of models. But more importantly, once engaged, they can't leave, lest they be knocked down by Ghast's parting blow's. If your opponent's don't have 2" melee? Most of them are pretty much stuck if they started in base contact with him! Add in Fear and Rising Anger, and it just add's to your opponent's frustration when trying to deal with him. Essentially, Ghast is kind of like a big black hole that you can park somewhere, and your opponent will generally have to make a tough choice whether to try and take out this 21 hit-point monster, or just deal with being controlled until he can be dealt with later.

The next model to really focus on is Silence. He generates 3 Influence, which by itself is very notable. But the fact that he can bring back Dirge from death is sweet too. He is randomly a good kicker. Oh, and has 5+ defense with 15 hit-points. All-in-all, he would be a solid addition to your team, even if he didn't have great character plays.

But, it is his character plays that really add more to the control aspect of the game. With access to both Tucked and Shutout, he literally can control your opponent's turn. Certain teams, like the Mason's, who rely on very specific order of activation's really don't like being told which model has to go next and which model has to go last. Really, Silence is just gross, and you, Mortician's player, will probably put him in every team you ever make!


There are plenty of other Mortician's models to look at, but these three are the one's I feel you should learn to use first. Not only are they excellent rule's-wise, but they allow you to play the whole aspect of control and denial in Guild Ball. They also require more practice to make sure you are fully utilizing their disgusting powers. The other character's are pretty much used exactly as written on their cards, and are more "obvious", more or less. I may go over them in the future, but for now, learn the nuances of using these guys. The more you can learn about these models, the better a Mortician's player you will become! Oh, and I'm sure I'll have a Scalpel discussion sometime in the future.

Have an amazing day, and welcome to the world of annoying your opponents intentionally!

-the aY

Sunday 25 September 2016

Magnetizing and Transporting your Guild Ball miniatures!

You've probably met someone, or at least heard of someone, who magnetizes all their models and puts them in tins for safe transport. (If you haven't, well now you have: me!).

I had a friend who magnetized an entire army, some 100+ models, spread out among 5 or more different sized tins. That example is quite dangerous though. It was quite difficult carrying all those tins, and if he ever lost balance, his whole army had the potential to be ruined.

That example is a bit atypical, and probably impractical. But for a game like Guild Ball, where you only need 6 models for a game, and maybe 8 for a tournament, or even only 11 for a full team, magnetizing may be a bit more practical.

So, you may be wondering: why magnetize? Why not just use trusty foam and carrying cases? Simple: if you transport your models and actually take them out of the case to play, scratching your sweet paint job is an eventuality.

Putting your models on the table top can lead to damage. An errant dice roll, a model falling on a rough tabletop surface, or a measuring tape snapping prematurely can all lead to paint chipping from your models.


However, at least those are situations we can understand. If you use your models, there is chance for wear and tear. That is what we expect with most things in life.

But your models being scratched while sitting in a carrying case is just disappointing. It's not even something that you can control. Foam just happens to be rough enough that friction can rub the paint off your models. This is especially so with points and edges, usually on weapons.

However, if you magnetize your models, you eliminate the chance for wear and tear of your models during transport entirely! There is no foam to rub the paint off your models. Also, sometimes models can come into contact with each other in a case. Friction between those models can cause chipping. That wont happen here either! The illustration to the left shows how strong a hold these magnets have. The tin can even be held upside down and shaken, and they still hold!

The best part is, all you need are strong magnets (rare earth) that are probably available at your hobby store, or various other random places (like Princess Auto), and hot glue to attach them to the bottom of your base. Then, the metal storage container can be acquired from anywhere. Danish Butter Cookie tins, metal lunchboxes, or even tins from the dollar store! You can add little flair by spray painting the tin, and adding in a stenciled Guild Ball logo on the lid. Kind of like what we did when putting the logo on our home-made mats from my previous article HERE.

But remember the story I mentioned about the guy with 5 or more different tins who precariously carried them to the hobby store? We can add some safety by putting the tins in a bag to carry. I bought a small lunch bag from the hardware store, sprayed it black, and added a Guild Ball logo to personalize it.


The official Guild Ball bag from BattleFoam is $74 USD. It's a great, high-quality product, but it only holds 2 trays of foam. This arrangement allows as many tins as you want (depending on the size of the bag you buy), and smaller models can even be magnetized upside down on the lid for even more storage space! This whole combination only cost me $15 Canadian, taxes included!

Now, there are some downsides to magnetizing. In theory, if you threw your Battlefoam bag, filled with miniatures, your models have some chance of not being too broken. With this layout, extreme force will likely cause the models to detach from their spots in the tins. This isn't so much of an issue for me, as I have been carrying models in cases for the last 20 years or so, and not once have I ever accidentally thrown a carrying case. I've dropped them from my hand, resulting in a 1-foot drop, maybe. But that shouldn't affect the magnetic hold of these models. Also, this process also adds extra cost and time to each model. If not done correctly, you may also have your models still move around when the case moves around. Make sure you do it correctly, or else it defeats the whole purpose of this method! Also, if you happen to use metal rings to mark AOE's (I'm looking at you, Alchemists), be warned: your models may move from their current positions on a table if the rings are placed too close to your models base. If you are OK with these concessions, then magnetizing your models may be right for you. It sure works out for me!

Enjoy the rest of your day! :)

P.S. Due to some input, I will write an article on how-to, and points to consider when magnetizing your models!

-the aY

Monday 19 September 2016

Alchemists Spotlight - Midas Striker Team

Last week, I decided to trade in some Magic cards on a whim. Apparently, I had some cards that were worth some decent coin! With my spoils, I picked up the remaining two models of the Hunter's team (Seenah and Chaska) that I was missing, and the entirety of the Alchemist faction, minus Katalyst. I also got to pick up Decimate and Mist, so I can use them in my Mason's lineups.

After playing so much Butcher's, I thought I would like to play a Striker team, but not so obvious like the Fishermen. But, after looking at the cards of the Alchemists, combined with some Union model help, I thought it was very realistic to make a fast-paced, high-octane Alchemist team that could threaten the goal from multiple threat vectors.
I also happen to like the idea of playing super-solos that can do a lot themselves (I'm a fan of this playstyle in many games), so I thought the obvious choice would be 'King' Midas himself. The hobbyist side of me wanted to make my model look like he was actually performing some kind of field alchemy, so I took my regular cork bases and made something that was very Full Metal Alchemist-esque. If you don't know what that is, you owe it to yourself to watch that series! It's probably my favourite anime series of all time.

Back on topic: Midas is amazing. The whole GB community probably already knows that. He can be a beater if he needs to be, but I think his comfort zone is being zippy and scoring goals. If you can steal 'Where'd They Go?', then you are in for some amazing times. He is just so mobile, and he has so much defensive tech built in, he feels almost unstoppable. His only weakness is that he can only activate once a turn, really.

   So, with all this Midas threat that is always on the table, I knew I needed to add some more strikers to make it a Striker team. Vitriol is the obvious choice. A very mobile, accurate Striker, who also happens to be able to beat face if need be. Also, she happens to be debated among the community as a contender for "best Striker, non-captain" on the forums.

   I think under most circumstances, having a double striker list is probably enough to be considered a goal-oriented team, however I prefer threat saturation when we are going for skews. So, let's add a third Striker! Mist was the top candidate. Although they tend to have great kick stats across the board, the remaining Alchemists don't quite have the mobility to be true Strikers. Mist having Where'd They Go just gives him that extra mobility to get into good scoring positions, or get into a spot where a snap-kick is possible. While he is excellent, the lack of a momentous tackle generally means he can't be the first activation in a turn to score a goal. So beware!

   Rounding out the rest of the team, I put in Flask as the mascot based on community feedback, but Naja could work. After a first-turn cloud to help Vitriol, I just tend to leave the mascot by the goal to help act as a ghetto goaltender. Compound, I feel is an easy-include in any Alchemist list, just because he generates 2 Influence and can act most turns without any INF. Just having the Rush-keeper stops certain goal runs, and controls a large table area. The sixth spot is what is currently the slot I have yet to finalize. Decimate seems to be the natural choice with her good kick stat and mobility, plus her ability to generate momentum easily if required.

   When I play with this list, it just feels like I can play recklessly, make mistakes and bad trades, and still come out on top at the end of the game due to the high capability to score goals from multiple models on the team. It doesn't matter if you give your opponent 10 VPs because you aren't defending well, or accidentally give a way easy take-outs. As long as you get 12 VPs, you still win! If you are an alchemist player already and haven't tried playing this way, try it out! If you aren't an alchemist player, but are looking for a new team, I'd say this is a solid choice. I know it's not any news to say that Midas is awesome. But for those who have never played as Alchemists, you don't realize how FUN a list like this is to play until you try it!

Monday 12 September 2016

Kicks for Kids Tournament Battle Report!

   Well, this will be my first ever battle report, for my first ever tournament in Guild Ball. It was a friendly tournament to help the Sick Kids Foundation, held at Meeplemart. Be sure to visit there to get some product, and play some games against some friendly people!

The battle report wont have every single detail, but I'll write as much as I can remember. It was too frantic to takes notes, as we were on Team Tactic's timing (45 minute death clocks, with 1-minute activation's after, giving up 1 VP when you end those turns).

My 8-man roster was:
-Fillet
-Princess
-Boiler
-Brisket
-Shank
-Rage
-Avarisse & Greede
-Tenderiser

I was seriously considering Ox going into this tournament, because I am much more familiar with him, but I really wanted to use my newly converted Fillet for the first time. That article showing how I made it can be found here. A+G was just there to meta against other A+G's. The rest of the team are pretty standard-fare for Butcher's teams.

Round 1- Jacob and the Alchemists. <Smoke, Flask, Vitriol, Hemlocke, Decimate, Compound.>
Jacob and I had a gentleman's agreement to not use Avarisse and Greede.

   The match started off with Vitriol going way up, and scoring a turn 1 goal. Unfortunately, she also ended up in a big forest that was on my side of the table buffing her, and making it harder for me to get at her. She was effectively locking down Brisket from efficiently getting the ball, and Shank was distracted by her too. At least Fillet now had the ball, so I could threaten the goal, and goad my opponent into coming closer to Fillet to try to get the ball. Smoke came up and used a combination of abilities to essentially put Poison on my whole team. My whole team through a variety of conditions, and attacks was down 3-5 damage. Very strong start for the Alchemists, I'd say. Alchemists 4, Butchers 0.

   The next round was a good one for me. In the previous round, Rage and Boiler had been able to put up some bleeds and reasonable damage on Decimate, and Smoke, and this turn, a very aggressive Hemlocke had tried to do some damage on one of my players. My fully-loaded Fillet charges into Decimate who has not yet activated (and has 4 INF) and does enough to get her down to 3 life before I legendary played to finish her off (and deal 3 damage to Smoke and Hemlocke). Fillet then finishes off a very wounded Hemlocke, and dodges into Smoke to finish her off. Alchemists 4, Butchers 6.

   The next round, I use my activation's to soak up the Gluttonous mass on Compound, apply bleed on him, and deal some small damage to Flask with Boiler and Shank. Smoke ends up retaliating by attacking Boiler, but he survived, and now three enemies are relatively close together, and all wounded. I weigh the options. I knew I needed to take-out one of them, and I could try scoring a goal to finish the game. I'd let the dice determine what I would do. Fillet goes in, and finishes off Smoke in only 2 hits. So, I thought if I still had 4 Influence, I may be better off trying to get the last 4 VP's by killing the remaining 2 models instead of hoping for 3 dice to get a 4+, and "wasting" 3 Influence. In the end, I decided to go for the take-outs. We kill off Compound who was at about 5 life or so, and we kill Flask. He explodes, and kills my Boiler.

But there we had it, Butcher's victory, 6 take-outs.
Since I wasn't hindered getting to the Alchemists, I was generating a ton of momentum. I was using a lot of  it to heal and remove various poison's off my players. I may have healed over 20 damage that game using Momentum.


Round 2 - Victoria and the Butcher's. <Fillet, Princess, Boiler, Brisket, Shank, Rage>
An exact mirror match, including our exact roster selection! Victoria was a newer player, so I tried to explain a few things as we played.

Both of us played quite conservatively at the beginning. We each moved our models up to the pitch cautiously, with my Brisket holding the ball. My intention was to have her and Shank move up the field to get some goals, while Fillet and friends took care of everyone else. I think Victoria was intending the same thing, and were on the same side as my pair. See? A true mirror match!

The next round, anyone is in range of anyone. Everyone on both our teams were probably in a big 8" circle on the field. One of us

was going to lose a model for sure this turn, and I wanted to make sure it wasn't my Fillet, so I start by putting Swift Stance on Fillet with Boiler and then applying a random Bleed to someone. Victoria responds with Rage going into my Shank, and doing some significant damage. Maybe in the lines of 10-12. I pretty much knew Shank was dead, and I decided I would let him die (even with 3 INF), and activated Rage to Tool Up Fillet and then Free charge her Fillet. I do around 4 damage on Fillet and more importantly, apply Bleed to her. Victoria, as expected, activates her Fillet to finish off Shank and deal some damage to my Fillet. But the 6+ defense keeps me from taking too much. I do a counter-attack at some point to do more damage to Fillet. So, I look at the table, and see that her big damage dealers have gone, and decide that Fillet can wait to activate. I activate Princess to get into melee with two of her models for gang-up potential with Fillet. She activates her Shank and does some damage to some people, but I am getting excited to activate Fillet.

Fillet's activation turn! She does damage to Victoria's Fillet, bringing her down to 2. I use my Legendary Play to finish her off, and deal damage to her Rage. Fillet then advances and kills both Rage and Shank. 3-kill activation again! The rest of the game boils down to my healing a lot, and then finishing off her wounded models that came back onto the pitch, while our Brisket's danced around each other to try and get the ball from each other. In the end, it's 12-2, 6 take-outs again.

 Round 3 - Sam and the Brewer's. <Esters, Scum, Hooper, Stave, Mash, Friday>
Once again, a gentleman's agreement to not use Avarisse and Greede. I have to be the kicker, so I choose the side that happened to have two obstructions in front of, and on either side of the goal. I felt this would be a good position to funnel my opponent in, and make it harder to get a clear goal. I decide to replace Brisket for Tenderiser.

I nominate Shank who is way off in the flank to be my kicker. Sam responds by putting most of his team on the left side of the table, but keeps Friday on the right to have his striker's out on either flank. Shank goes up and kicks the ball way on the other side. The scatter favoured me, and Friday was the only model able to actually retrieve the ball.

Hooper then goes up and far charges my Rage, leaving him knocked down, and on only 4 health. I respond with Boiler going in on Hooper, applying a Bleed and some damage, and healing Rage. Other stuff happens, but then Fillet comes in and wrecks Hooper, so I can have an early VP advantage. I see Sam measure out this HUGE range from Mash to my goal. He wanted to do some long-range goal scoring, probably involving teamwork plays, but my Tenderiser seemed to be deterring him from going through with it.

Throughout the game, Sam's dice conked out on him and he failed a few passes which would force him to use extra influence which messed up his activation's. Esters eventually came up to charge Rage (and Boiler) again, but he also flubbed some attack rolls, 2 of which netted 0 hits after armour. That left Esters open to be killed by Fillet and friends.
While all this was going on, Shank was on the top left of the field constantly harassing and stealing the ball and threatening the goal, causing my opponent to have to commit 2-3 players to try and beat him down and take the ball. However, counter-attack-dodges kept pesky Shank alive to harass some more!

Eventually, Shank tried to score a goal from the flank after stealing the ball, but it missed and ended up somewhere behind the goal. The current score was then 8 to 4, and it looks like we weren't going to score any more goals. My opponent tried to heal up a ton of damage to prevent easy take-out's. Both of us ran out of main clock time, and we alternated activation's, giving up a point each time. A new round began, I got to go first, and at 10 to 6, Fillet went in and finished off a wounded Hooper to finish the game.

The event concluded, and I was 3-0! I won a sweet Butcher's patch for best in-faction, and the rest of the prizes were distributed via raffle tickets. I got an extra ticket for being the 3-0, and got to win the only Butcher's model I don't own: Truffles! And a Hunter's patch for my wife! All in all, it was a great event, I met some new friends, and I got to experience games against teams and captains I've never played against. Fun times!

I know this wasn't really as in-depth, or detailed as some would like, but it's what I can remember off the top of my head without notes.

Hope you enjoyed it!


Saturday 10 September 2016

DIY Goal Post for Guild Ball - Pile of Gold

In Guild Ball, a lot of the personality of your team comes from having a custom Goal Post to represent the character of your team.

If you go to the main Guild Ball Forums, you can see all sorts of custom things people have done under "the Display Cabinet" sub forums. From there, you can get all sorts of inspiration.

Recently, I was inspired by my friend's Union Goal Post. Very appropriately, it was a large mound of coins. He told me the overall gist of how he did it, but I decided to revise the design a bit.

If you are interested in making something similar, here is the simple guide:

1- Use some kind of clay (or play-dough!) to make the base of the mound as pictured.

2- Stick random bits to add some character to it. I happened to have a sword and banner lying around.

3-After the clay hardens, reinforce it with glue (I used hot glue), prime it, and give the whole thing a base coat of paint.

4- Once it's all done, put on a watered-down layer of glue and use Gold Glitter. Fortunately, my glitter I bought at the dollar store is actually round, so if you look very closely, they actually look like coins.

5- Once dry, seal it in with another layer of watered-down glue, and there you have it!

I like this particular goal, because not only is it appropriate for the Union Guild, but because I put my moniker ("the aY", duh!), it is applicable to all my teams. Yes, I am very vain, it seems.

Hope you enjoyed this blog entry! :)

-the aY

Monday 5 September 2016

Try converting a model! Guild Ball - Fillet: "a REAL Blood Dance"

Well, I know models and how "cool" they look can be a highly subjective thing. When it comes to Guild Ball models, I think they are overall very good, but sometimes they are missing a little something extra.

In the past, when I bought models, I assembled them as quick as I could, primed them, and painted them immediately. I didn't bother cleaning models, filling in gaps, or anything else like that. I didn't care at all about the hobby aspect. I just wanted them on the table so I could use them to play the game.

Overall, I am still like that. But I certainly clean the flash and mold lines off of all my models now. Filling in gaps is still something I don't care enough to do, but thankfully, the models today seem to be of higher casting quality than they used to be of yesteryear, so it's not something I ever feel I have to do. There just aren't as many gaps as there used to be.
 Back to Guild Ball. I feel like a lot of them are missing "something." Either they are too static, or they are just missing some kind of flair. I'm not a conversionist. I have done the occasional mod here and there, but I just don't have the time or care to do some of the crazy things I've seen people do with their models.


 However, it's Labour Day, and I am in a very, very rare situation in my life: I'm relatively unbusy today! Mind you, I still put up a floating shelf, did my grocery shopping, went on a walk with my family, and am hosting a BBQ for the in-laws. But I thought, "I have an hour or so... let's Make Fillet REALLY Blood Dance!"

So, my first conversion of any real substance that didn't involve just a head swap. Check it out! Sure, maybe it's very un-realistic. It's very anime-esque. But I just wanted my Fillet to have swirls of blood circling around her as she dances through and slices down her opponents. I think this accomplishes that look. :)

Hope you guys like it, and I hope it inspires other non-hobbyists to try something new with their models.
Have an amazing day!

-the aY

Wednesday 31 August 2016

"Brief" Faction Overview in GUILD BALL - Helping you pick your Guild!

As promised from our podcast... speaking of which, if you want to listen to the audio version, it also has some added commentary that wont be found in this article, along with some other Guild Ball-related discussion, you can download it here.

This article will briefly go over each faction to help new players choose a Guild in their favourite mob soccer game. You'd be surprised how the Internet is not yet flooded with articles related to this, so I may as well contribute to the start of the future deluge. 

Just a disclaimer, these will be some pretty broad statements. The intention is just to give you an idea of what to expect when you play with and against these factions. If the article says something like “this Faction wants to score goals, but they can’t really kill anything,” it doesn’t literally mean that they can’t kill anything. Rather, they are just very focused on scoring goals, and have to go a bit out of their way or work harder to take down a model.

First, we will talk about the two most straight forward teams. This is not to say they are necessarily easier to play or are a vanilla faction. They are just very focused on what they do, and are conceptually easy to grasp for most people.

Fishermen – Excellent at mobility. Moving around, dodging all over the place. They are also the best overall team for consistently scoring goals. One thing to watch out for: while most teams usually want to receive the ball, Fishermen don’t mind kicking it. Don’t be surprised if you see Shark kick the ball up at the beginning of the game, get the ball himself, and then score a goal on turn 1. Many players feel that getting at least 2 goals with the Fishermen is almost certain. It’s how they get the last 4 VP’s to win the game that’s the puzzle they get to play.
Fun fact: The team only has 4 momentous damage results among all the players on the team, and 2 of them belong to the Captain: Corsair. So, don’t be too afraid of getting too many guys taken out when playing against the Fishermen. Instead, watch out for multiple Reach models striking you from out of combat range, and dodging around you to score more goals.

Butchers – These are guys are on the other end of the spectrum as the Fishermen. They hit hard, they easily take down most players in the game, and they generate a ton of momentum doing it. They are the glass cannons of the game, and if you like slicing through your opponents, this is the faction for you. Their starter box captain, Ox, is a Force multiplier. He basically has a damage buff aura that is always on, some damage debuffs, and a Legendary play that buffs damage even more. So, the idea here is, no matter what damage result you roll, let’s just say 1 damage, after all the buffs, it counts as 3-4 momentous damage. You start going higher up on the playbook, and you can get 5+ damage on a single hit! The other captain, Fillet, is kind of the opposite, where she wants everyone to support her and funnel their power into her so she can slice through the opposing team herself and dance away. Either way, you get to cut through your opponents with a sweet cleaver.

Now we’ve covered two teams that are on the opposite ends of the spectrum. The rest of the factions are a bit more nuanced and their strategy varies greatly from team to team.

Brewers – If the Butchers are about slicing through your opponents with a cleaver, the Brewers are more about a beat down with a tree stump. They do a lot of knockdowns, they are resilient, and they can do a lot of damage. The differentiating factor of Brewers damage versus Butchers damage, is that Butchers have consistent damage across their playbook, and it’s almost always momentous. With the Brewers, they generally only have one or two damage columns, with only one usually being momentous. Usually it’s the big damage number. However, since they have short playbooks, combined with their buffs and ability to knock down, they often get to wrap the playbook, so you get the possibility of big spikey damage.

Morticians – At the time of this podcast, people would already have heard that Gencon’s top 3 players were all using Morticians. Fear not, new people. Apparently, this is only really an American trend, and the overwhelming presence of the Morticians at top tables is not pronounced there. What makes this faction good? It’s about controlling the game. You can steal Momentum, increase Influence costs, move your opponents models. If you like to actively screw around with your opponents plans, this is the faction for you. The biggest piece to note though, is the original captain: Obulus. He is the most prominent face of the Morticians. He manipulates models, he steals Influence and gives it to his friends, and he himself requires effort to pin down. And his influence stat is 5/8, so that’s apparently good.
Alchemists – While the Morticians directly manipulate the battle, the Alchemists manipulate the field by putting AOEs all over the pitch, and they create cover for themselves, and put conditions on their opponents. They will also try to directly put all kinds of conditions on your models. So, if you don’t have an efficient way of removing conditions, expect to take poison damage and be lit on fire all the time. Midas himself is also an incredibly versatile Captain that has defined this faction for quite some time. He is another super-star Captain that is resilient because he is hard to hit and pin down, he can lay the smack down if required, and he can steal a Character Play for the rest of the game. This means if you have something really sweet, let’s say Scything Blow, then Midas will also have that sweet ability to use against you all game. The faction is relatively pillow-fisted when it comes to hand-to-hand combat, so condition damage and scoring goals is the name of the game here.
Engineers – Are the ranged faction. They love to use Character Plays to damage, push, and knock down their opponents. I said the Alchemists were kind of pillow-fisted. What’s even fluffier than pillows? In hand-to-hand, the Engineers may be the worst team. So the idea is to keep the enemies at bay through ranged control, and score some goals to win.
Masons – This is one of the most versatile factions, and it’s the synergy faction. Overall, the Masons have high armour for resilience, they have a lot of pushes, and they have the ability to activate multiple times, thanks Honour, every turn. They have arguably the best Striker in the game, Flint, who can score a goal 22 inches away, unassisted. Add in random shenanigans, and you are almost guaranteed 1 goal every game. Then, we have the concept of the Mason’s Missile. Essentially, one model (either Chisel or Mallet, goes almost the whole way across the table, takes someone out, then retreats back to safety. You also have Honour, can either choose to give someone else an extra activation, score a goal with her 4 dice kick stat, or beat down almost anyone herself, with the appropriate buffs, you have a team that does it all. This all sounds awesome and OP, but there are some things to consider. First, the synergy concept. If you start removing key pieces, let’s say Marbles their mascot, they lose a lot of board control and damage potential. Chisel is fragile, and likes to hurt herself to ramp up damage, so she is easy to remove as the game goes on. Removing Honour herself shuts a lot down. The Mason’s generally have to wrestle with the order of their activations every turn. The more you can wrenches you throw in their gears, the more they have to cope with what to do next.

Hunters – The newest faction to be released, the Hunters are the most different of all the other guild’s. Since they are the first new Guild after the initial Guilds were released, Steamforged really tried to shake things up. The Hunters are about de-buffing enemies, then doing take-outs for the majority of the time. They also have the ability to score random goals to contribute to the win. Their biggest trademark is the ability to easily put out a condition called Snared on the opposition. This slows down their enemies, and lowers their defense so the Hunters can run amok with their opponents having a reduced ability to retaliate. Theron, the captain puts snared on any target he damages, and then he puts up a forest every turn that he can use as cover, to hinder opponents movement, or other creative things. They also have the ability to put out trap markers all over the field to put even more snared conditions on the opponents. The short way to describe the faction: they are a ranged faction that slows down and softens up their opponents, and then finishes them off in melee. They are a pretty versatile faction, but they have some drawbacks. They are relatively squishy. They tend to not have armor stats and they have to be careful with their Influence use, as almost every character wants to be loaded up, so the Hunter player has to prioritize and make what feels like big sacrifices every turn. Theron is kind of the lynchpin to a lot of the Hunters plans, so if you are able to take him out early, you can greatly change the game in your favour. Jaecar is also a high priority target that will probably make it into every Hunter’s team forever. He is their main damage dealer, and he puts out trap markers, making him incredibly useful for the Hunters.

I hope this article helped you decide which faction to choose. Personally, I doubt you can go wrong, no matter what faction you choose. And most people tend to end up getting more than one faction anyway. Regardless, have an amazing day! Until next time!

-aY


DIY: How to make a GUILD BALL mat - A step-by-step guide


This article is going to show you, step-by-step, how to make a sweet, textured, rollable mat for your favourite mob soccer game: Guild Ball!

The materials you will need: 
-3x3 cloth surface. Felt, or any cheap but durable cloth will do.
-At least 2 tubes of Acrylic caulking (and a caulking gun will be helpful)
-A flat tool to spread acrylic. I used an ice scraper.
-A sponge
-Paint
-Painters tape
-White spray paint, and whatever paints you want your surface colour to be
-A print-out of the Guild Ball logo
-Precision knife


Step 1- The first step is to spread the caulking all around the mat. You can apply liberally. As stated before, it will probably take at least 2 tubes.


Step 2- Use the flat surface tool to spread the globs of caulking around, evenly on the mat. You ideally want the whole mat to look white.


Step 3- Once the whole surface is covered, take the sponge and just dab the surface all over. The point of this is to get texture on the mat. It will look like grass or rough ground.
Step 4- Paint the mat in your desired colour. The most obvious colour would be green, but really, whatever terrain you like, that is what you can paint. Important note: try to use THREE (3) colours.                                                         

So, for this green pitch, get a Dark Green, a lighter green, and yellow. Paint the whole surface with the darkest colour first. Once it dries, lightly brush (think drybrushing) the lighter green over most of the mat. Once that dries, use the yellow and sparingly drybrush parts of the mat. This will make the whole mat look better.


Step 5- Now, to truly turn this mat into a GUILD BALL pitch, you need to add the details!
Take the print-out of the Guild Ball logo, and start cutting out the black parts. This will essentially become a stencil for you to use as the main focal point of the mat.


Step 6- Next, you are going to use the painters tape and block off parts of the mat to make it easy to spray paint on the white lines of the pitch.

This is probably the most work-intensive part of the whole project, but it's not hard.

You need several specific measurements:

-Tape at the 10-inch mark to mark the deployment zone. You will then put a second piece of tape just below that tape, leaving a gap to be as thick as you want the line to be.


-Tape the stencil on the center of the mat, and tape off the half-way line (18 inches). Helpful tip: the stencil may flop around later when we spray paint it, so you may want to roll up tiny pieces of tape and tape down the stencil. Don't worry too much about taping EVERYTHING. No matter what you do, it wont be perfect. We just want it to not be too messy.

 -Tape on the 6-inch mark to represent the goal line. This part isn't really important, but it will help complete the look of the field.

Once again, a second piece of tape just below that one with a gap in between as wide as you want the line to appear on the pitch.

To add even more flair, you can put smaller pieces of tape every inch or so to make it a dotted line!


 Step 7- Time to spray the exposed areas between the tape, and spray the stencil.
Step 8- You may notice the lines have bled out a bit. It's natural. So, we are going to manually touch up the over-spray and blurred lines.


Step 9- Another optional part, but it still completes the look of the pitch. Get a large circle to mark as the actual Goal circle.
We are now done the Guild Ball pitch!

The total material cost of this sweet mat (Canadian):
-Felt: $3-7.
-2 tubes of caulking: $5.00
-3 paints from the dollar store: $3.75

The other stuff, I had laying around. As miniature gamers, you probably also have white primer at home, and most people have painters tape at home. That stuff is inexpensive too.

TOTAL COST TO MAKE MAT: $11.75!


I hope you enjoyed this post, and found the guide useful. I have already made 4 different mats this way, and they are all a little different and unique. If you want to go for a more "used" look on the pitch, you can intentionally leave gaps in the caulking and then glue sand into the patches.

Happy Guild Balling on your sweet new pitch!

And thank you Steam Forged Games for making a game that I love to share!

-aY

Monday 29 August 2016

The Troll Patrol podcast- Helping new players pick a team in Guild Ball!

Well, the Troll Patrol is podcasting again...

I've noticed that the Guild Ball forums regularly get new threads asking questions along the lines of "I am new to Guild Ball. What faction should I play?"

These threads get a lot of activity, all giving good information, spread out among many posts and responses. I personally dug around the internet when I was starting Guild Ball to help me with my starting faction decision as well, and I too found information a bit too spread out. So, I took it upon myself to compile some brief summaries of every faction, in one spot.

I will put out a transcribed, written version on this podcast on a very near-future blog post. But for now, I just wanted to get the word out.

Please enjoy!

-aY

http://museonminis.com/troll-patrol-guild-ball-faction-overview/

Friday 26 August 2016

Painting models throughout my life.

When I first got into the whole miniature game hobby, painting was the last thing on my mind. I tried to paint because I wanted my bare metal and plastic models to look cooler, but without any direction or advice, my paint jobs looked like thick, gooey messes that obscured any detail the model may ever have had.

Eventually, I would get a part-time job at GW, and with it, there were certain expectations. Aside from the fact that you were not allowed to play with unpainted models there, being an employee, I felt I needed to up my abilities to be worthy of the GW-staff mantle. So, I asked my co-workers for advice on how I could improve my skills. They gave me what was very obvious and basic advice, but at the time, they were things I didn't even think about doing.
Increase your colour palette. Use a palette! Add some water to your paint. Hold your wrists together so you don't shake. Lick your brush to keep the point (most people still don't like to do this one, but I do it religiously). Simple concepts, but they started me on the road to becoming a decent painter.

There was just one problem: I didn't care about painting that much. But as I mentioned before, you couldn't play with unpainted models. So, I started painting faster. I still used the advice I was given. But I just painted as fast as I could, and kept everything in the lines. Over time, I started becoming pretty good at the whole speed painting thing. Depending on the type of model, let's say ones with lots of ridges and mainly metallic robot guys, I could even drybrush the majority of it. If I primed my models black, it could hide uneven coats of paint. I painted a whole Eldar army in one day so I could play in an event the next day. It was crazy.

I honed my skills over time, improving over the course of a decade to the point where my models looked pretty good. Then, I met some guys at my local game store, the Friendly Troll. There were two new guys that came: Alan and Brandon, and some existing people Andrew and Thomas. They were all excellent painters. They taught me the concept of how to blend and use more subtle highlights. I even tried to slow down my painting to try and do a "great job" instead of my regular "good job." However, I noticed I just wasn't at the skill level to see any sort of improvement when I slowed down, so I went back to speed painting my things.

But more time has passed. Another 3 or 4 years or so. My models still aren't going to win any awards. However, I see noticeable improvement over the models I painted even just 3-4 years ago. A lot has changed in the industry. Paints seem to have an overall better quality. GW shades (aka: "Liquid Talent" as Andrew calls it) literally upgrade a paint job a level. Bad becomes decent. Decent becomes good, etc. Paints are actually cheaper in real dollars. When I started about 20 years ago, GW paints used to be $4.00. Today, they are still $4.00. That means they are actually half as expensive as they used to be if you consider inflation! Best of all, since the Internet exists, people are able to exchange ideas. Even if it's not about painting directly, just being with other miniature gamers is bound to expose you to painters and sweet paint jobs.

All I know is, when I got Dust into this hobby, I taught him some very basic lessons on how to paint. It was information I was never given for a good 7 years or so. And guess what? Right off the bat, Dust's models looked way better than my first 7 years of painted models ever looked. Everyone is right: knowing is half the battle!

So, while I still have things I can improve on, I am happy with how my models turn out these days. I don't use black primer anymore. I certainly don't drybrush anymore. And I'm even more happy knowing that I belong to an elite few who are able to paint up some pretty sweet looking models in a very short time. That Chisel model pictured above? I don't know how long it took me to paint it. All I know is, I assembled, cleaned, primed, waited for primer to dry, and painted the whole thing in less than an hour and a half!

Anyway, I hope you all enjoy the hobby, whatever way you see fit. But I wanted to thank all the people who helped me along the way to get me to the point where I am today. I am always improving, and a lot of it has to do with those who have given me advice. And for those who want some advice from me, feel free to ask! :)

-the aY

Thursday 25 August 2016

First Post!

It's tough being a gamer.

This is a very first-world problem situation, I know. Despite the absurdity of saying "it's tough doing things I enjoy," it doesn't change the fact that I have so many wants in life, and there's just not enough time to do it all.

All my life, I've played games of some kind. Video games are the obvious example, but I remember going to some store in Toronto called Jester's Cap to buy Magic cards (my first foray into nerd gaming), and I remember seeing these boxes called "Warhammer" on them. They were toys or models or something, but I was told that you got to put them on a battlefield and play with them. It looked sweet, but as a 13-year-old, it looked prohibitively expensive. Plus, my cousin was "too cool" for this sort of thing, so he quickly talked me out of it.

I would always have a little niggling in the back of my mind that scratched at me and said, "hey... do you wanna play Warhammer?" I repressed it, because it was apparently lame to play games like that.

A year later, I go to visit my friend/neighbours house. We were supposed to play basketball, but he was sick or something. So, I thought I'd be thoughtful and hang with him at his house so he wouldn't be lonely. His brother opened the door, and as I peered in, I saw my friend, with some other people and my cousin who was too cool to play Warhammer... playing Warhammer! The cat was out of the bag. They were all uncool. And so, I joined them.

Years go by, and I get really hardcore in a variety of games. Warhammer, Magic on and off, Vs System (a Marvel and DC card game where you could win a lot of money), UFS, World of Warcraft Card game, Warmachine... basically a lot of time and money spent on a variety of games. When I get into something, I get pretty hardcore. The money part could be tough sometimes, but these days, it's time that I'm lacking.

Despite that, I have somehow found time at 1:00 AM on a random Wednesday (though it's technically Thursday now) to write a blog for posterity. Even if no one else reads this blog, I'll at least have some posterity... the day has been marked: the aY (me) of the Troll Patrol has started a diary, to talk about whatever gaming things are on my mind.

Should I go to sleep, or keep painting some models?

It's tough being a gamer.

-the aY